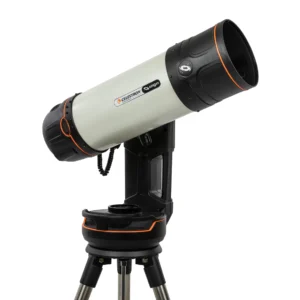
In this article, we will be unboxing the Starsense Explorer LT 114AZ telescope. This is one of the telescopes from the StarSense series of Celestron launched just a few years ago.
We will unbox the telescope, assemble it, align it, and will also see the celestial objects. We will also tell you the pros and cons of this telescope. If you buy this telescope, you can follow this article to assemble your telescope.
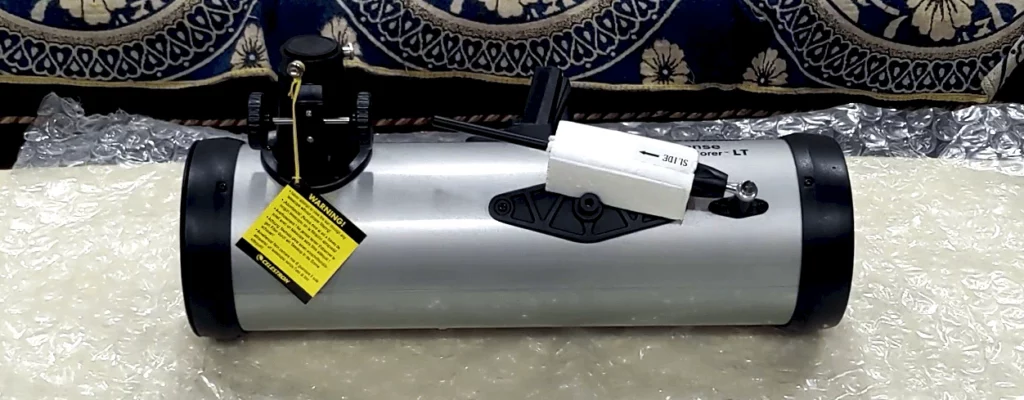
The telescope was very well & efficiently packed in 3 different boxes. One box is for an Optical tube assembly, one box is for a tripod, and an accessory tray & one box is for the eyepiece and accessories.
The 4th box is an empty box to fill out the empty space in the big package to protect the moving of the other 3 boxes while transporting.

You get the manual for setting up the telescope, with some other information about how to register your telescope on Celestron’s website and instructions to download Celestron’s sky portal app.
You will also get the code for the Starsense app without which you cannot use the telescope with your phone.
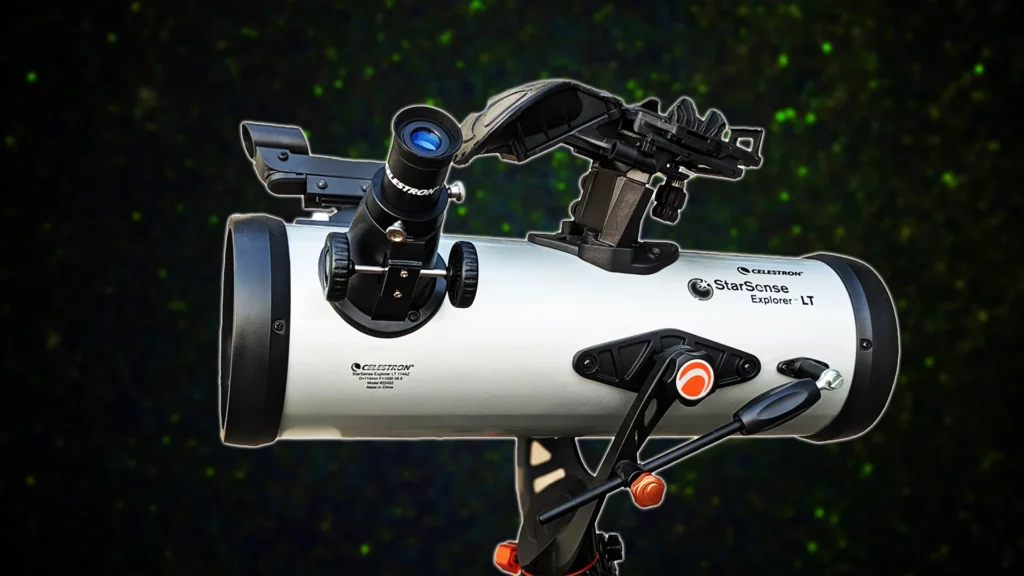
Optical Tube Assembly
Let’s see the optical tube assembly.
This is the optical tube, that antenna-like part is the altitude rod for adjusting the vertical motion of your telescope. The aperture is 114mm, its focal length is 1000mm and its focal ratio is 9.
Notice that the focal ratio is 9, which means the telescope is mostly suitable for the moon and planets. If you don’t know how the focal ratio works, then you need to read this article.
The weight of this optical tube assembly is 6.5 lbs around 3 kg. It is very easy for any adult to carry & move this telescope around.
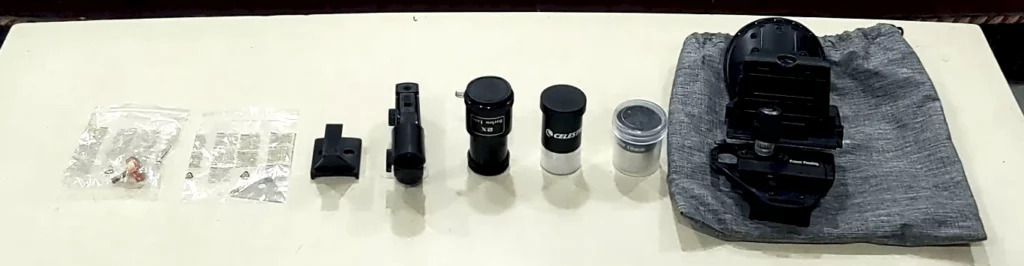
Eyepieces and Accessories
The accessories box has a bunch of accessories and eyepieces. There is a starsense smartphone dock to mount your smartphone which is the whole point of this StarSense series. Then you get one 10 mm eyepiece. One 25mm eyepiece. One 2 times Barlow lens.
The Barlow lens is lightweight and made of plastic & mostly just unusable. Then we have the finderscope or red dot finder.
Next, we have a stand to fit the Red dot finder on the telescope. A knob to adjust your vertical motion or you can say altitude.
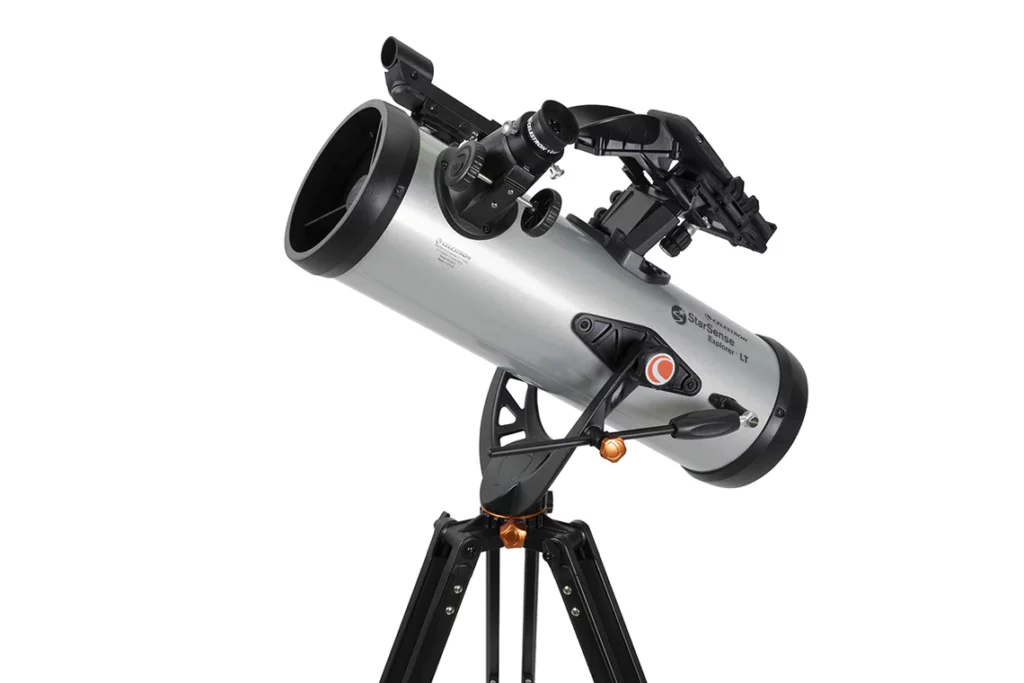
Trpod & mount
Next is the tripod box. It has a tripod and an accessory tray. The quality of the tripod is good enough and easily handles the weight of the optical tube assembly. The height of the tripod can be raised upto 4.5 feet.
Assemble the telescope
Fix the optical tube assembly
Now let’s assemble the telescope. While assembling the telescope. First, we’ll attach the accessory tray. On the side of this yoke mount, this part is an altitude rod guider.
Now you have to fix the optical tube assembly on the mount. You just have to hold the optical tube like this and precisely guide the altitude rod through the hole of the altitude rod guide.
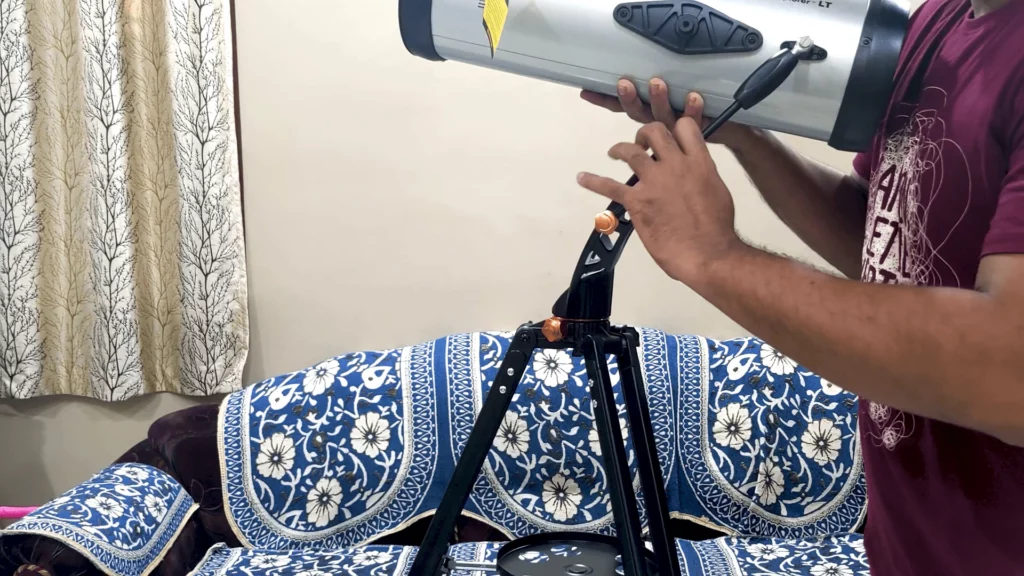
Next is to fix the optical tube assembly on the mount, adjust the altitude rod guider, and fix it to the optical tube assembly. And with this, you have successfully assembled the main telescope.
Assembling the accessories
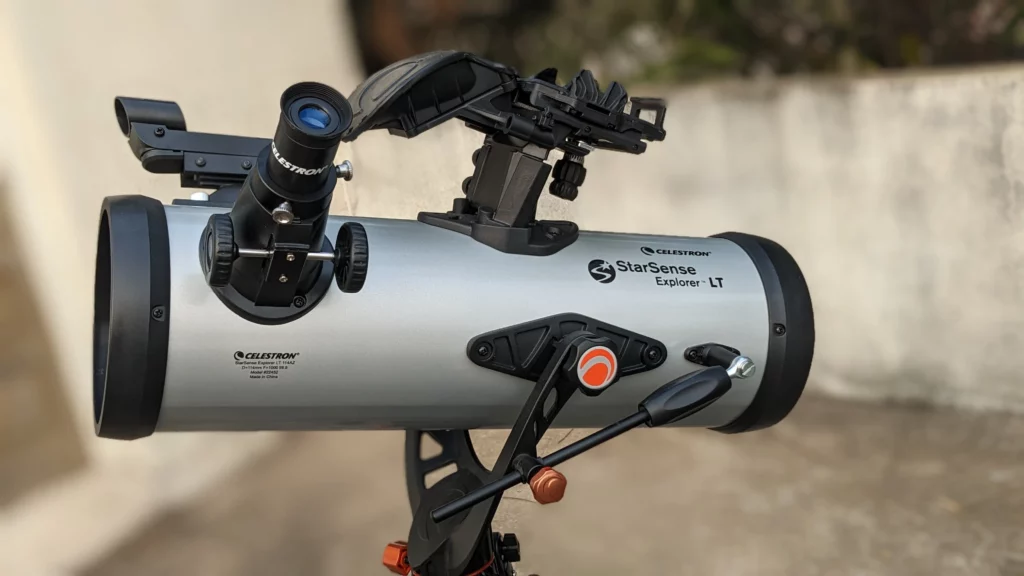
Next is to attach the remaining accessories. First fix the finderscope base, then just slide your finderscope onto the base and you are done. Next is fixing the eyepieces, just remove the dust cap and put the eyepiece.

The last step is to install this starsense smartphone dock. It is straightforward, just loosen the two screws on the dock mount. Slide your smartphone dock into the dock mount and tighten the screws.
Now your telescope is fully assembled. Just remove the lens cap and you are ready to observe.
Aligning the telescope
The next part is aligning the telescope. For this, you have to take your telescope outside during the daytime.
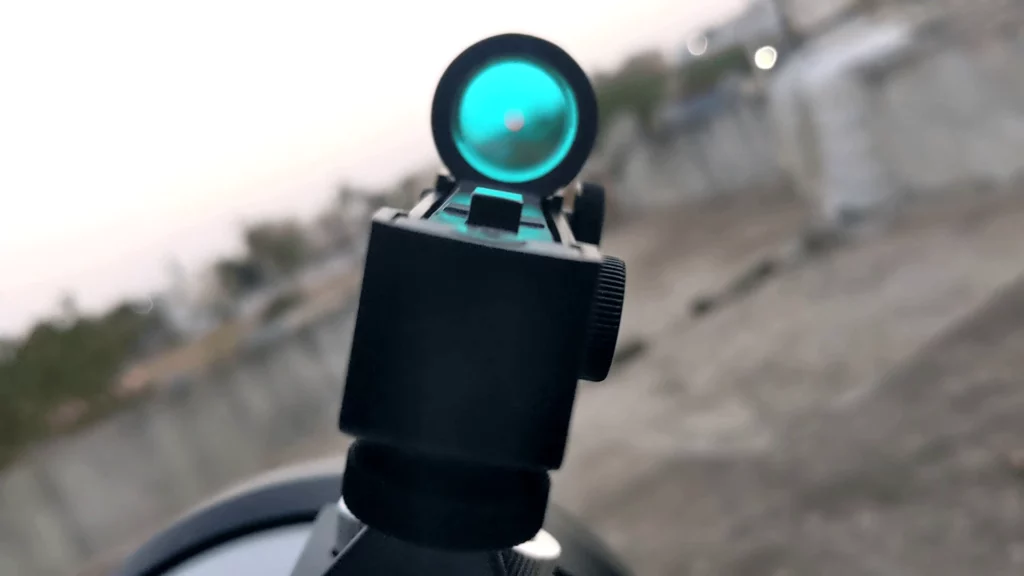
Turn on the finder scope. Adjust the red dot in the center of the finderscope to point at an object.

Put your 25 mm eyepiece in the eyepiece holder. Find any object which is around 500 meters and is easily visible. In our case, we focused on the tv satellite dish on top of someone’s home.
Now you have to move the red dot onto the object your telescope is focusing on. We pointed it at the satellite dish my telescope was focusing on. Once you do that your telescope is aligned.
Now you can use your telescope manually. All you have to do is to point the red dot on any object in the sky and it will be visible through your eyepiece.
Setting up the StarSense App
Now, let’s set up the StarSense app for your telescope. This is very easy all you have to do is to mount your phone on the telescope and start the starsense app. You will get an option to align it.
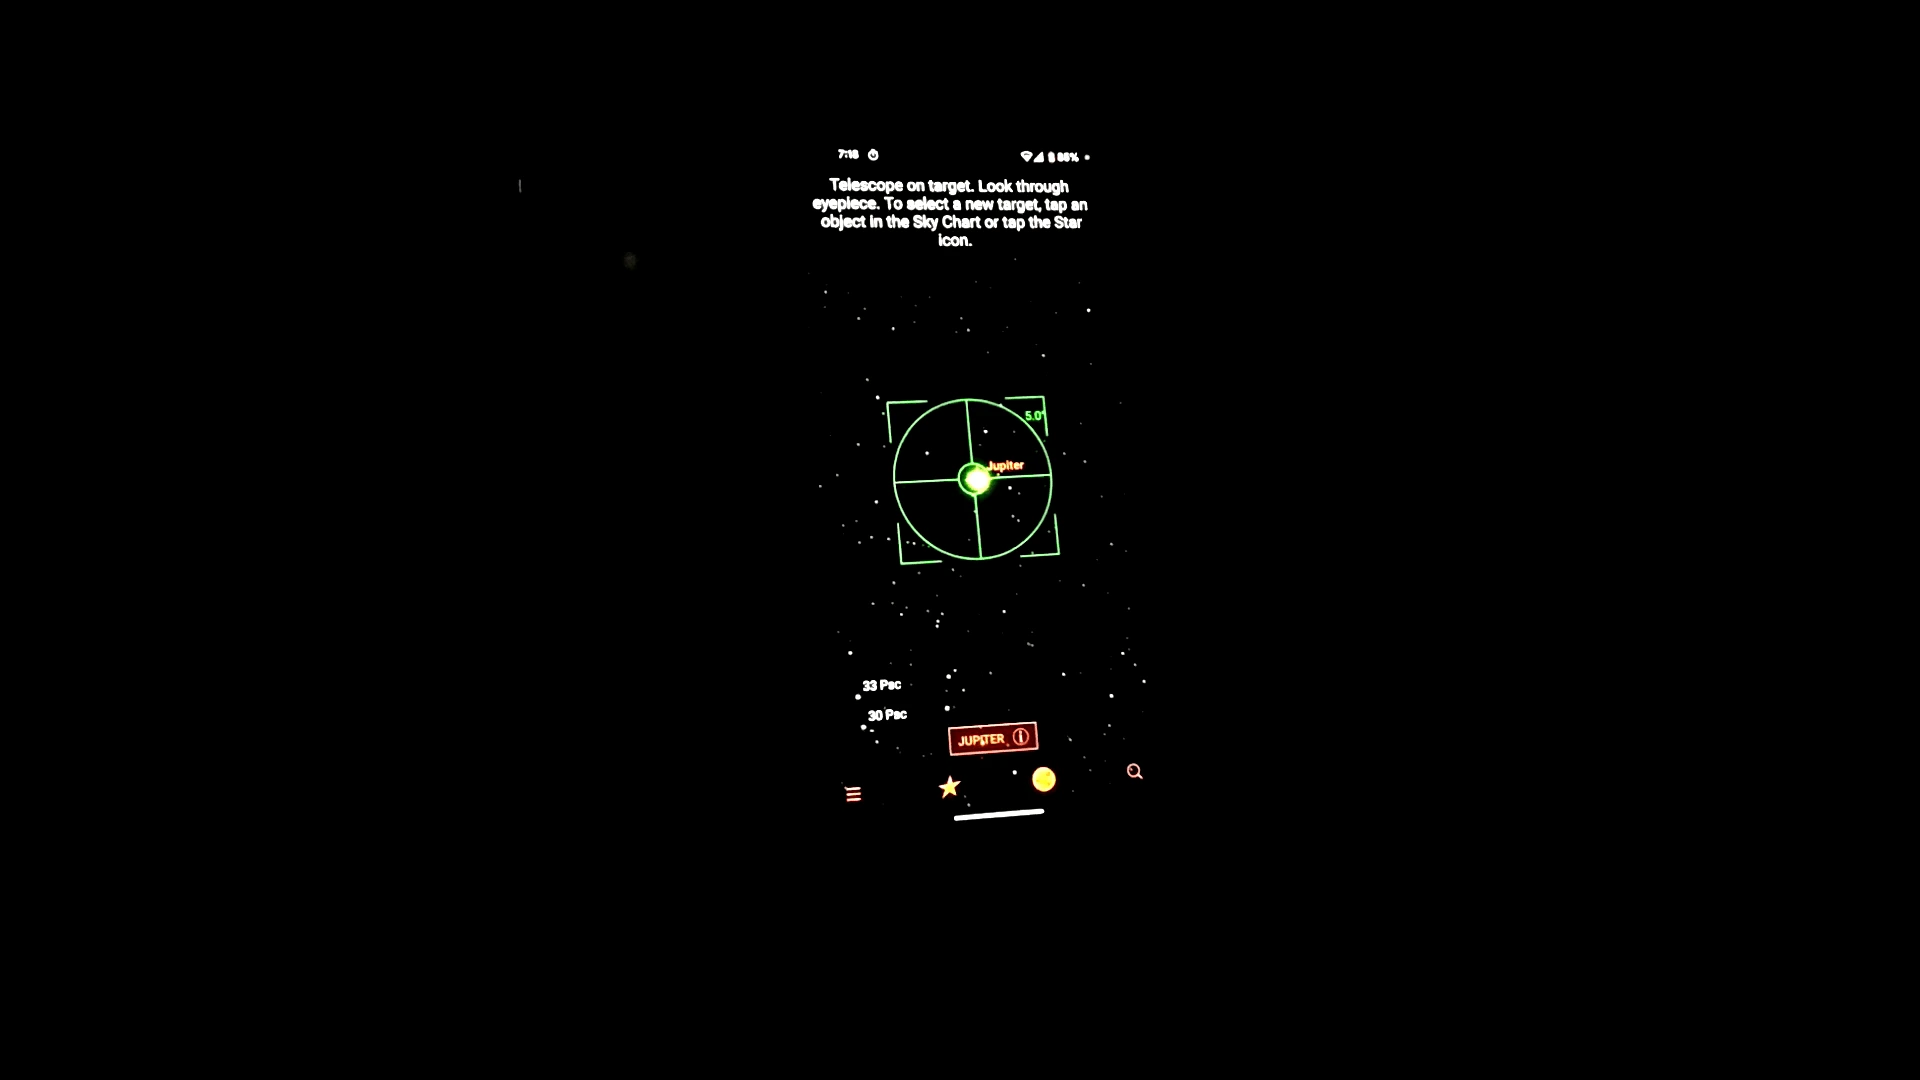
Then you have to point your telescope in the sky and the app will detect the location of your telescope and will tell you to align any object in your sky with the crosshair on the screen as shown below.
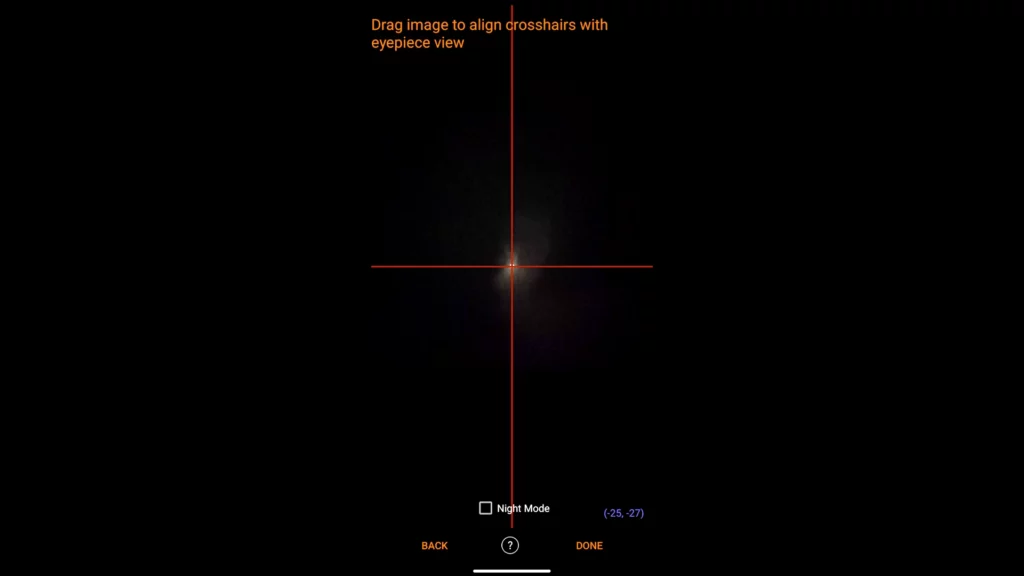
Next, you can search for any object you want and click on locate. The starsense will guide you to that object. Once you reach your target it will turn green and will be visible through the eyepiece.
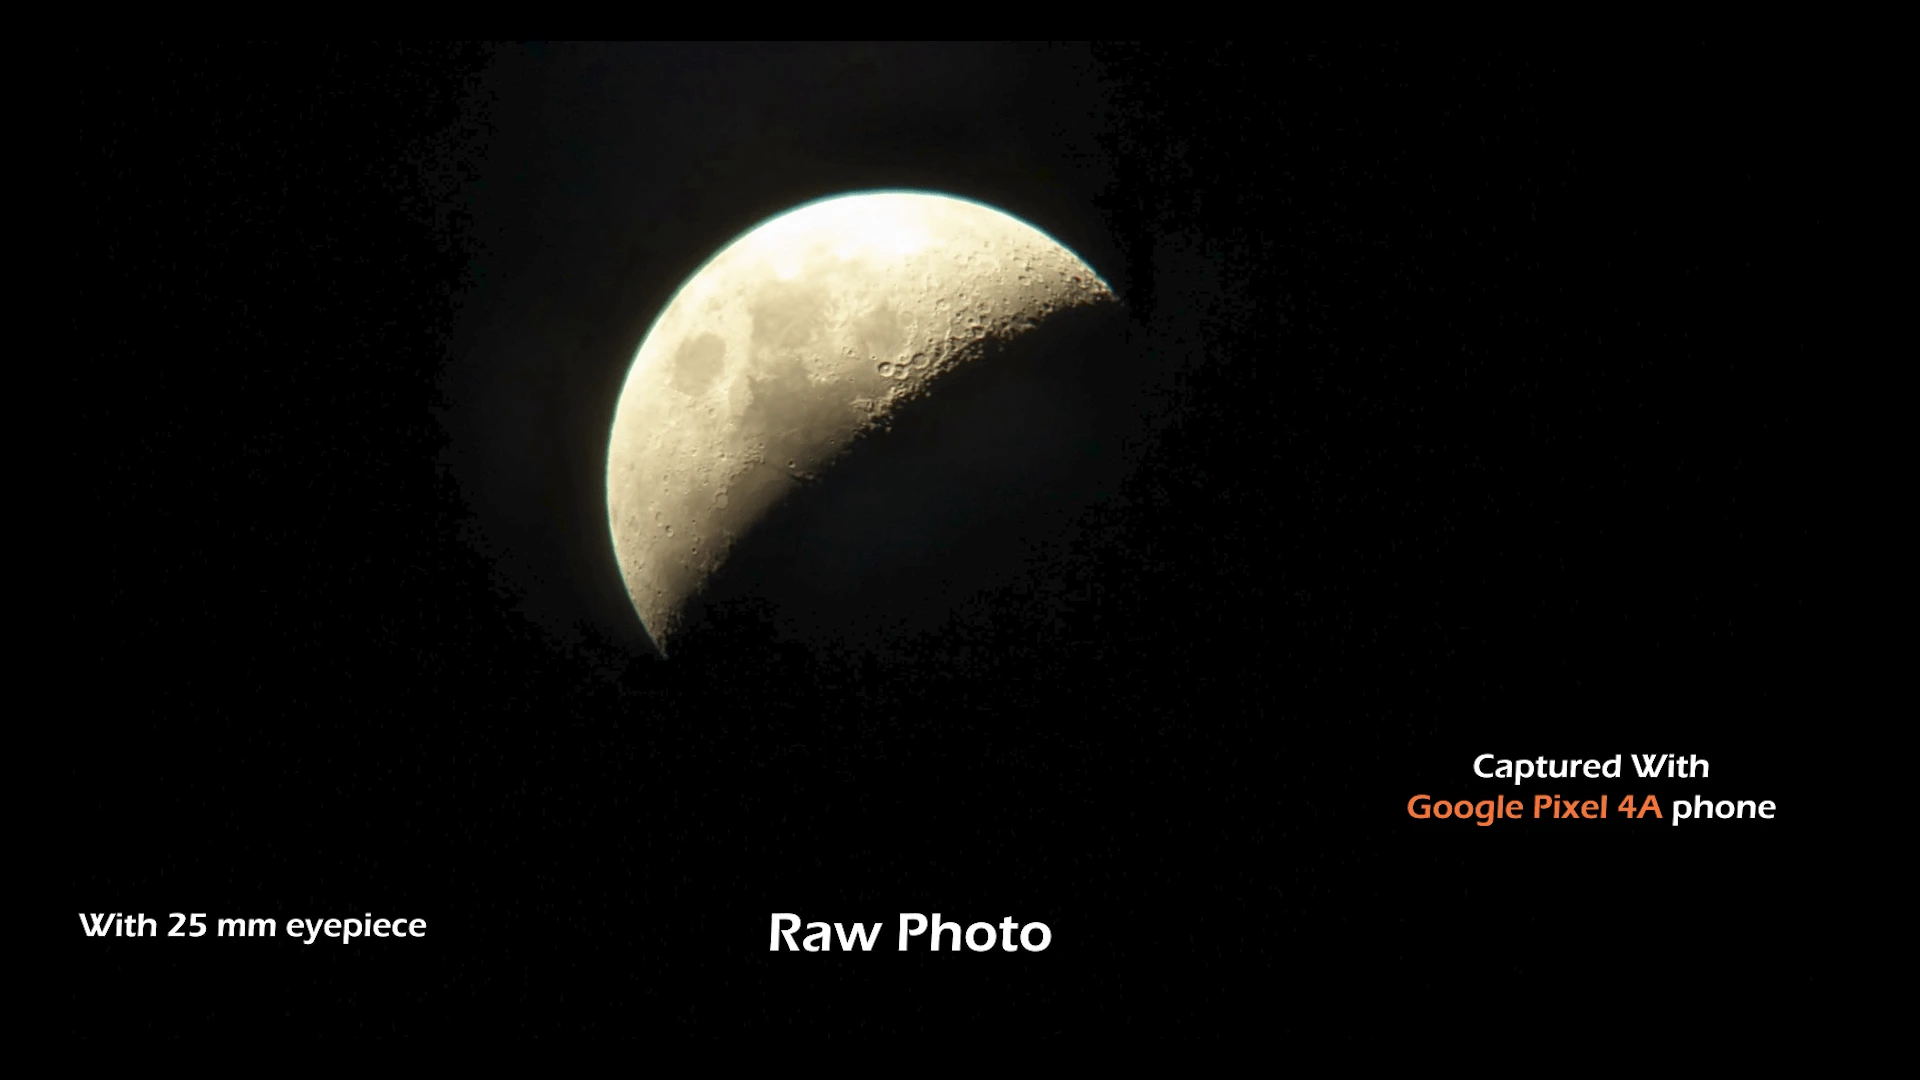
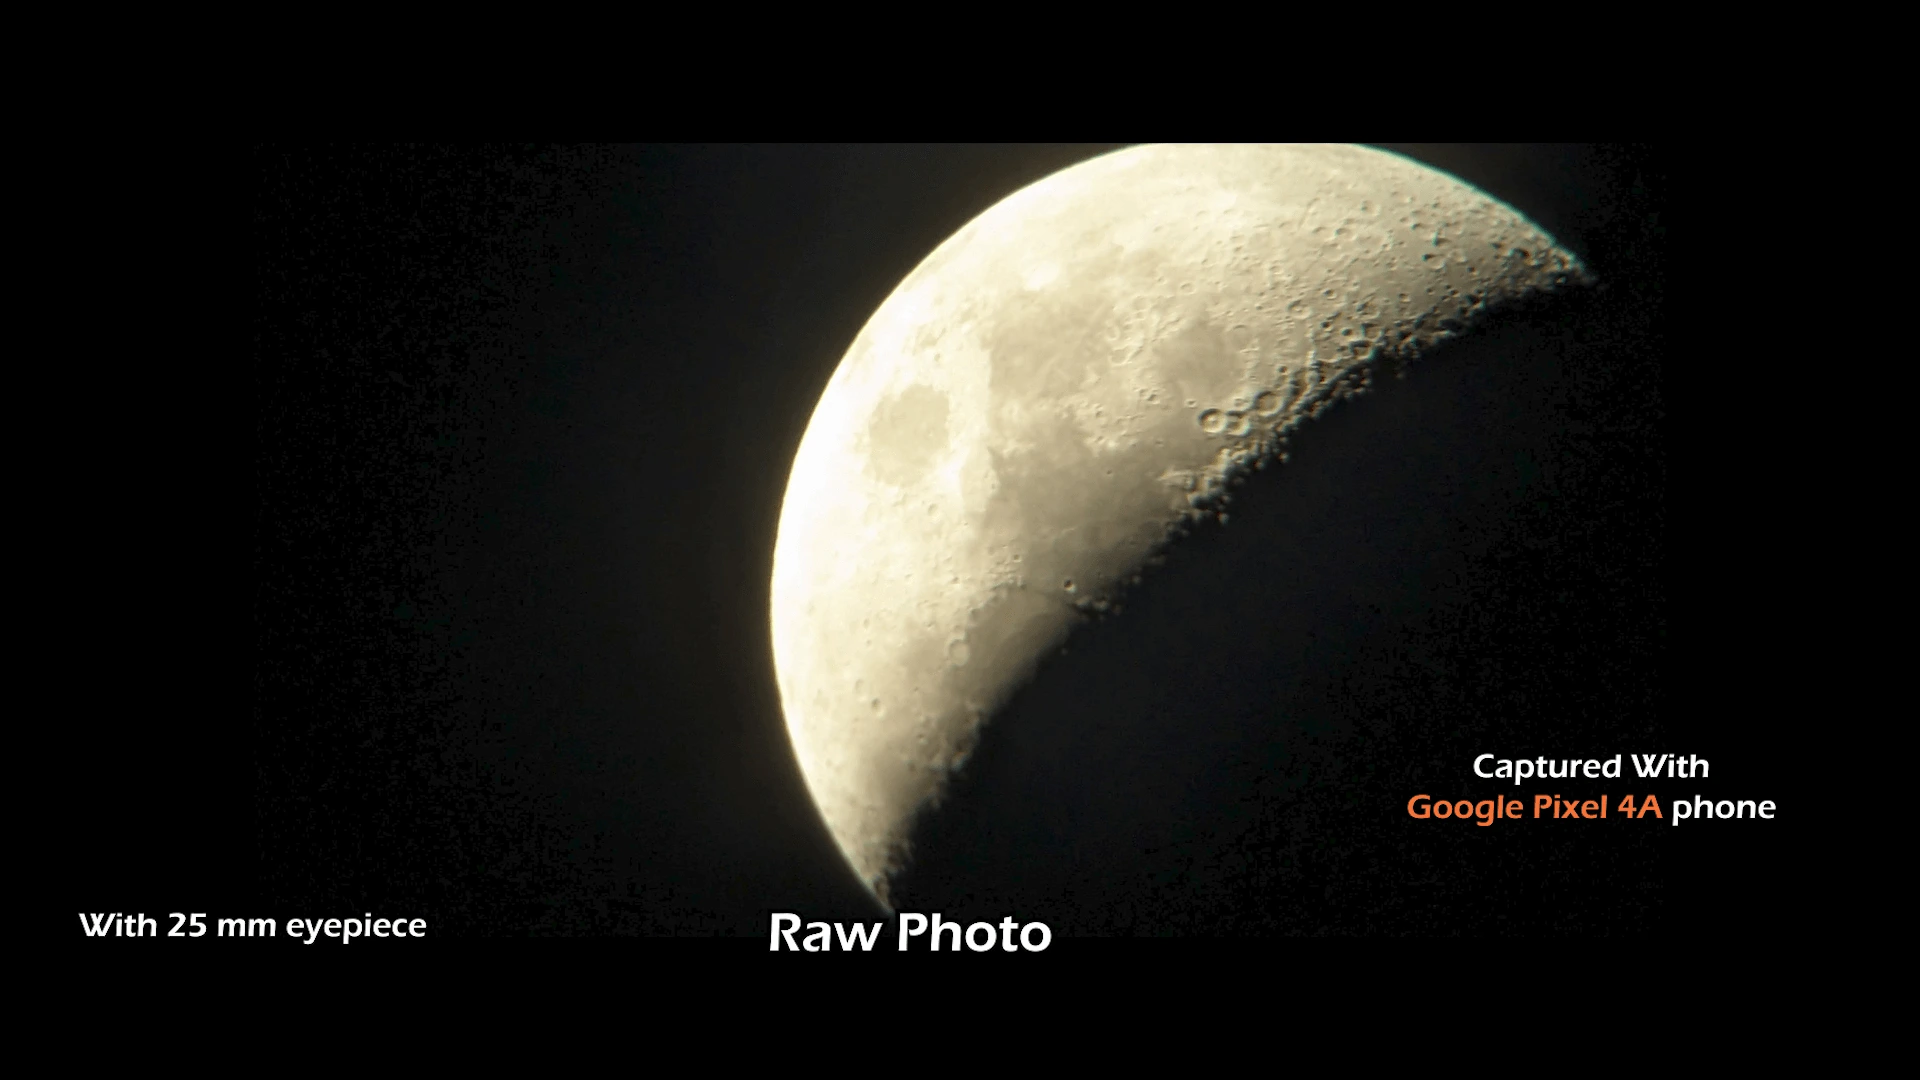
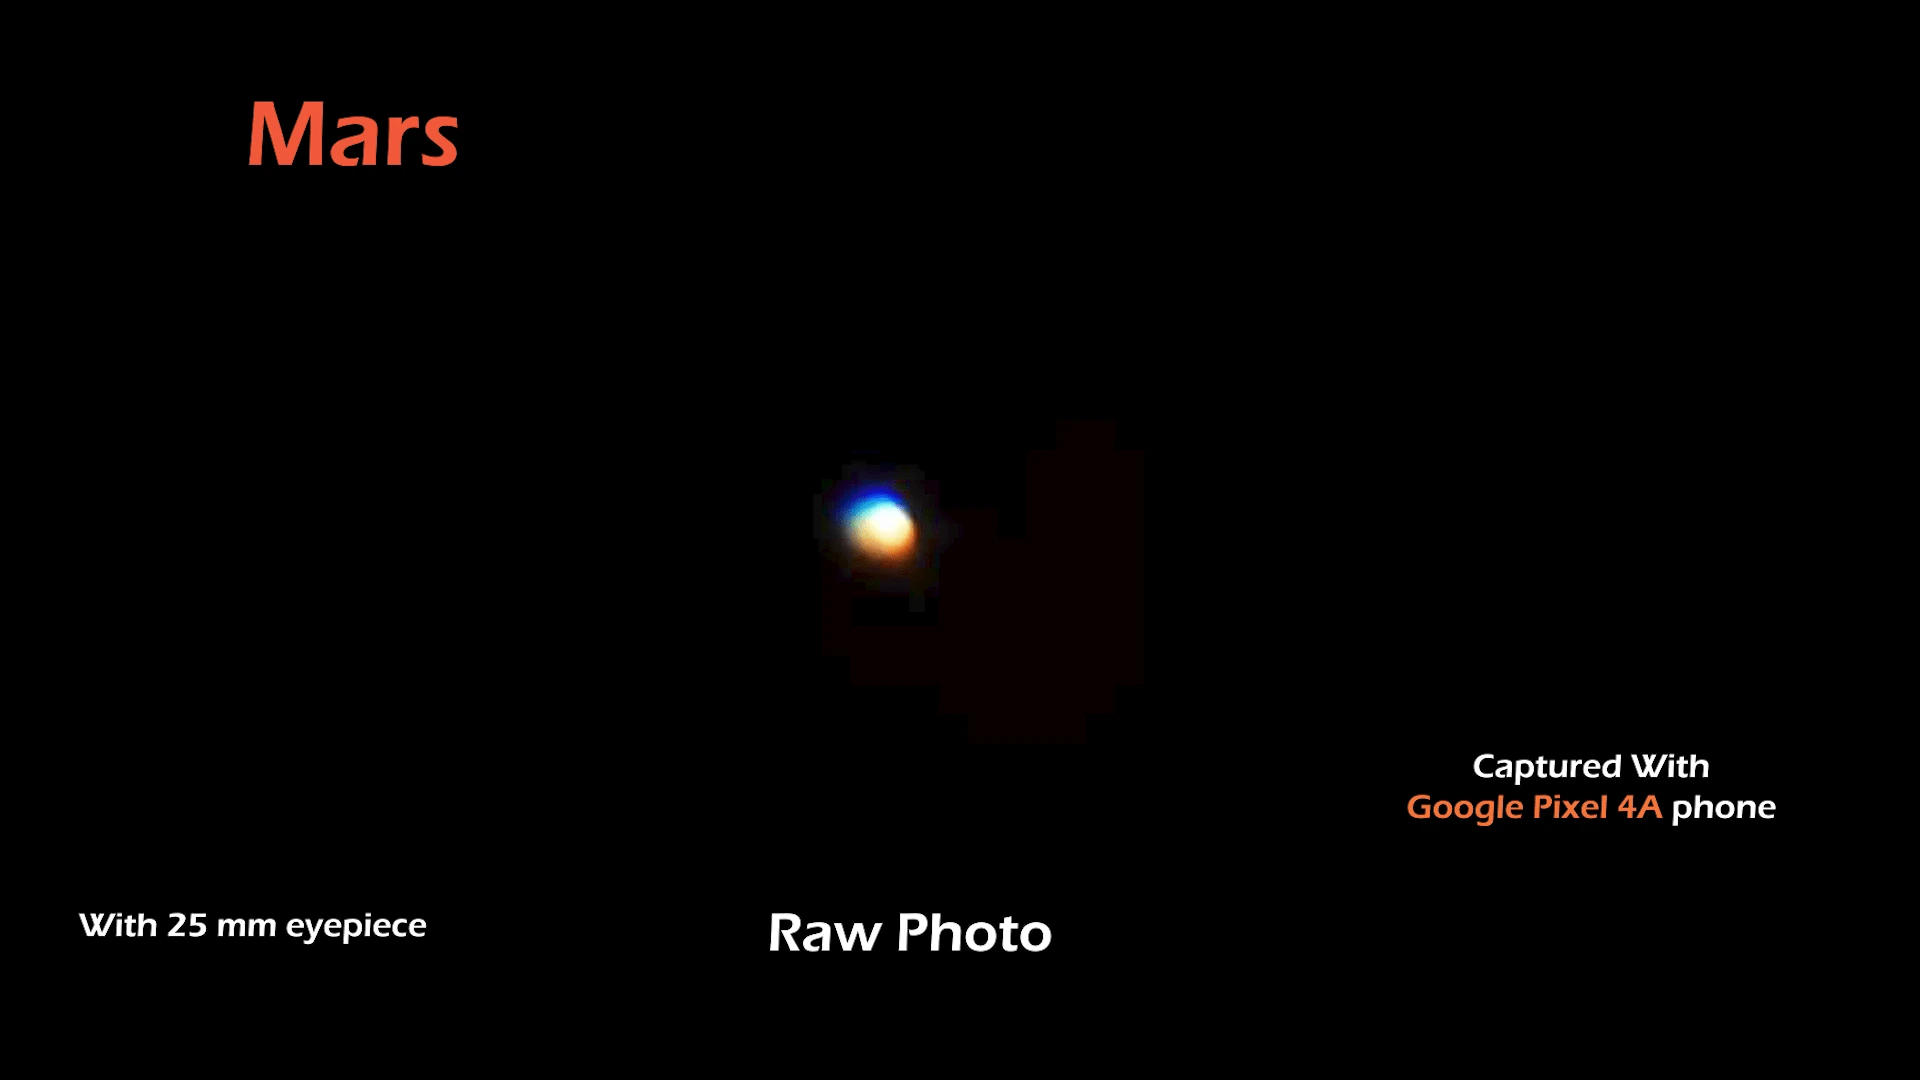
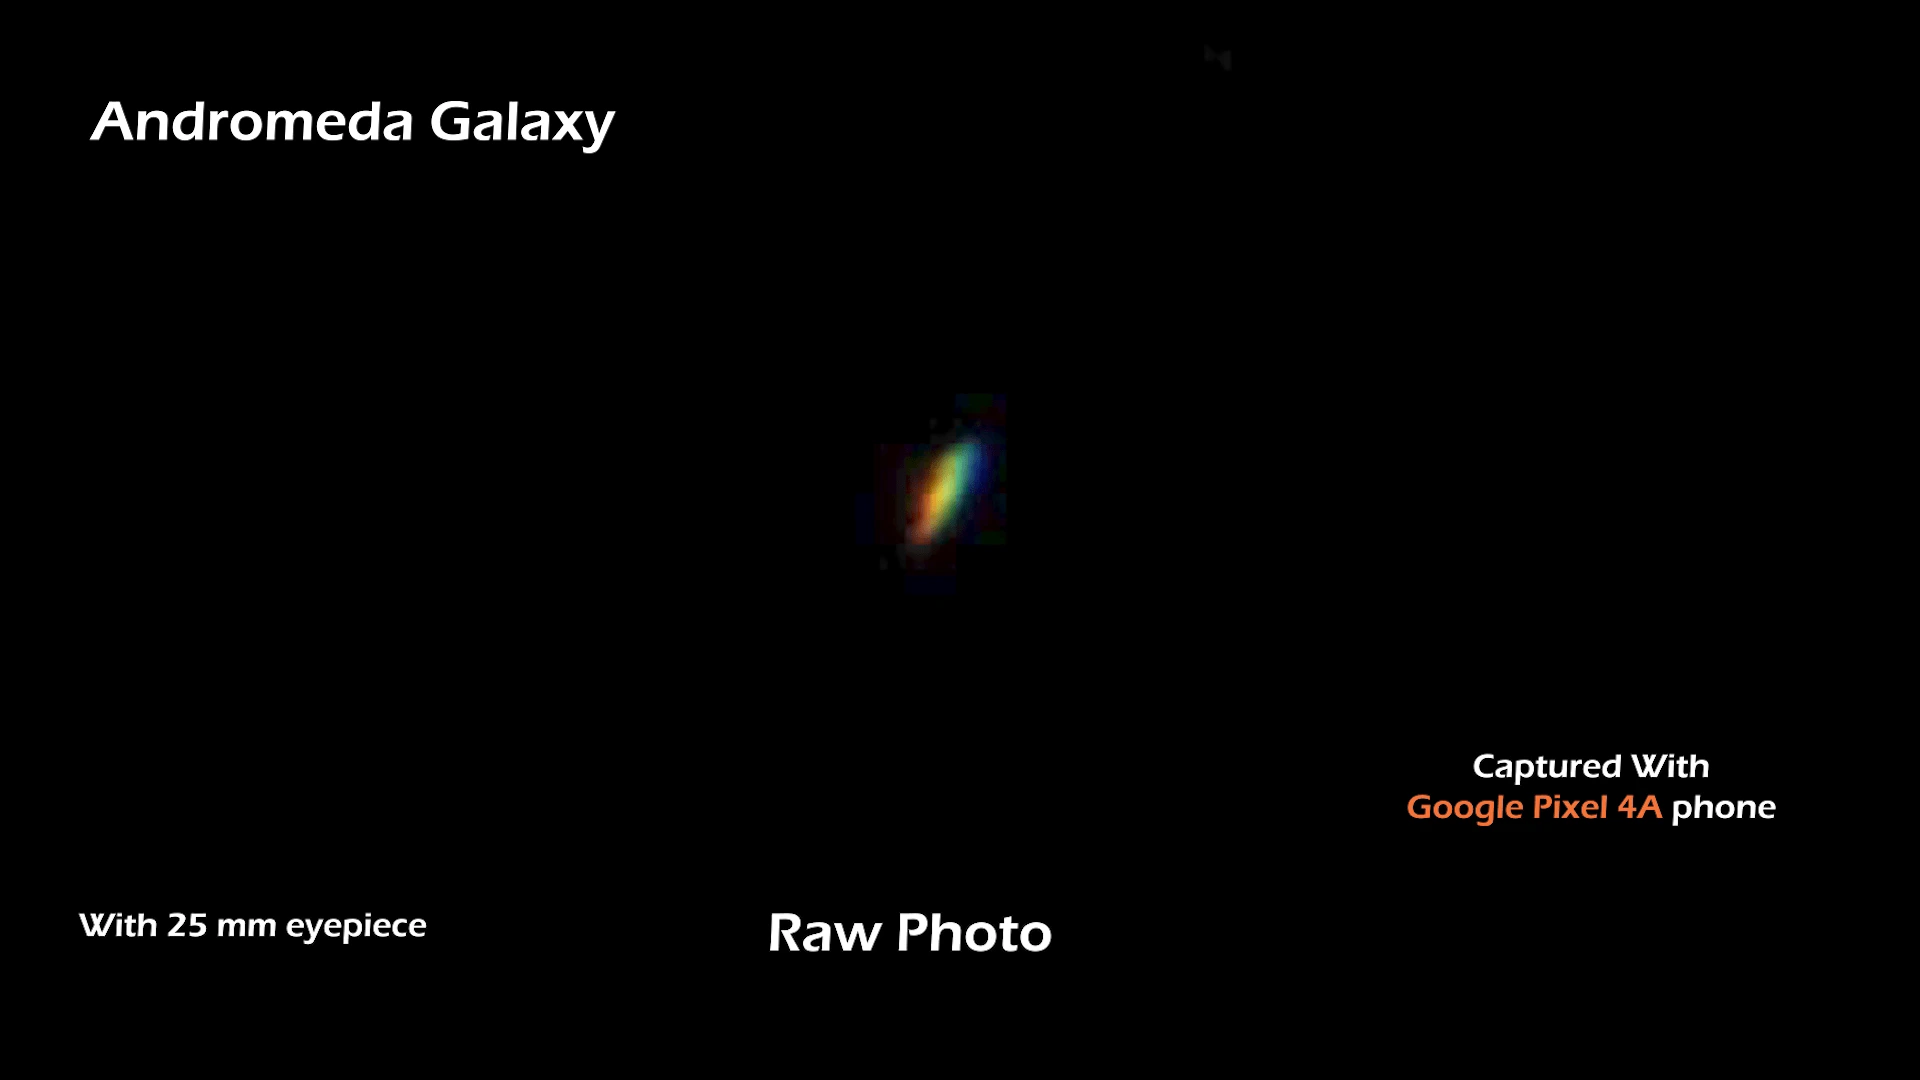
Moon & Planets From This Telescope

Pros & Cons of StarSense LT 114AZ
Pros
1. The telescope is lightweight & very easy to use.
2. The instructions to assemble the telescope are clear and very easy to follow.
3. The biggest pro for this telescope for beginners is the cost. You get many features for the price you pay for.
4. The best thing about this telescope is the Starsense app, with the help of the starsense app you don’t really need to worry about knowing the sky, all you have to do is to put the object you want in the search and starsense will guide you there. Any beginner can start looking at the celestial objects just within a few minutes.
Cons
1. The eyepieces you get with the telescope are the Kellner eyepieces. Plossl eyepieces are usually better.
2. The Barlow lens you get with this telescope is made of plastic & just unusable.
3. This telescope doesn’t have a slow knob for horizontal motion. However, its counterpart and the more expensive telescope StarSense 130 DX have slow knobs for both altitude & azimuth movement.
4. The starsense app sometimes doesn’t work very efficiently & not very precise many times.
Using this telescope is much more fun while using it manually rather than using it with the StarSense app. You can use any of the apps mentioned in this article and use the telescope manually to point the red dot on a particular object.
Conclusion
Overall, the telescope is specifically for beginners and is only suitable for visual astronomy. Dedicated Astrophotography with this telescope is not possible but you can click photos with the help of your phone. You will need a phone mount.
As your first telescope, it is a good telescope. It will definitely get you excited about astronomy. You will be excited to look at different objects. So, instead of buying those extreme beginner telescopes which are most likely only good for watching the moon once or twice.
This telescope can be a good choice and do the job for the money you pay for it. If you want any of your loved ones to get interested in astronomy, then this telescope also can be a great option to gift someone to get started.
If you have more budget then a bigger StarSense 130 DX from the StarSense series will also be a good choice. For those, who have an even higher budget, you can never go wrong with NexStar 6SE or NexStar 8SE.
Summary
| StarSense LT 114 AZ | |
| Aperture | 114mm (4.5″) |
| Focal Length | 1000mm (39.3″) |
| Focal Ratio | f/9 |
| Highest Useful Magnification | 269x |
| Lowest Useful Magnification | 16x |
| OTA weight | 6.5 lbs (3 kg) |
| Mount Type | AZ mount |
| Total Weight | 10.4 lbs (4.7 kg) |
| BUY HERE |
Hope you found this article helpful, If you are looking for a telescope specifically for astrophotography then you need to check this article. You can also find the best suitable telescope for you with our telescope suggestion tool.