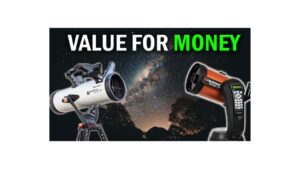
It is very difficult to look at the sun with our naked eyes. And looking at the sun with a telescope, where everything is magnified, can be dangerous. So, if you are thinking of viewing the sun with your telescope, your first concern should always be eye safety. Even a quick look at the sun can lead to significant eye damage, that’s why we use a Solar filter.
Galileo Blinded Himself Without Solar Filter
Galileo, who is also known as the father of observational astronomy, also suffered the consequences of directly looking at the sun. Around 400 years ago, to study sunspots, Galileo used to look at the sun with his telescope without using any filters, which initially caused significant damage and later permanently damaged his eyesight. Initially, he suffered from partial blindness, and eventually, over the years, he went completely blind. That’s why, to look at the sun through your telescope, you need a solar filter. If you go and get a ready-made solar filter, then it’s going to cost you a lot of money. But a similar solar filter can be made easily at home itself.
Making a solar filter at home
To make a solar filter, the most important thing you need is Baader film. This Baader film blocks 99.999% of the sun’s powerful rays, allowing you to capture details of the sun like sunspots and granularity. The second thing you will need is cardboard and some thick paper sheets.
Now, while making this filter, you don’t want to make the size of the filter as big as the aperture of your telescope. As the sun is very large, a filter that is smaller than the aperture will be sufficient.
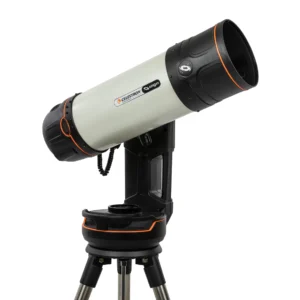
Now I bought a 10×10 inch Baader film as I wanted to make solar filters for both my telescopes, StarSense and NexStar 8SE.
Step 1
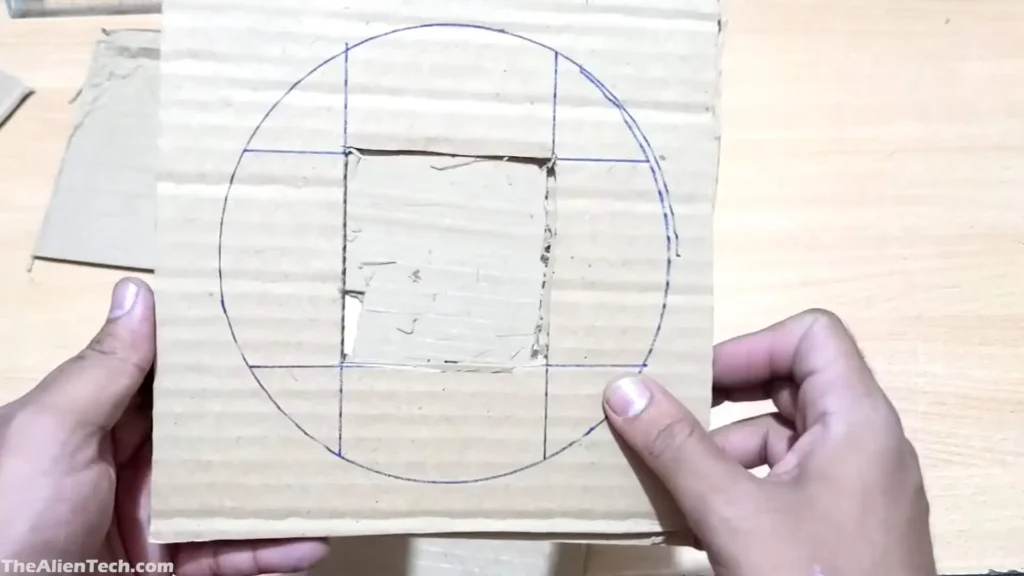
First, cut two larger cardboard pieces bigger than the aperture of your telescope. I used the aperture cover to draw a circle as a guide. I wanted the filter to be smaller than the whole aperture, so I knew how much bigger to make it. My telescope has a small aperture cover, so I made the filter a bit bigger than that. Instead of cutting it into a circle, I made it square because it’s easier to cut cardboard and the filter sheet into squares. Then, take the square shape and use it as a template to cut out another square from a second sheet.
Step 2
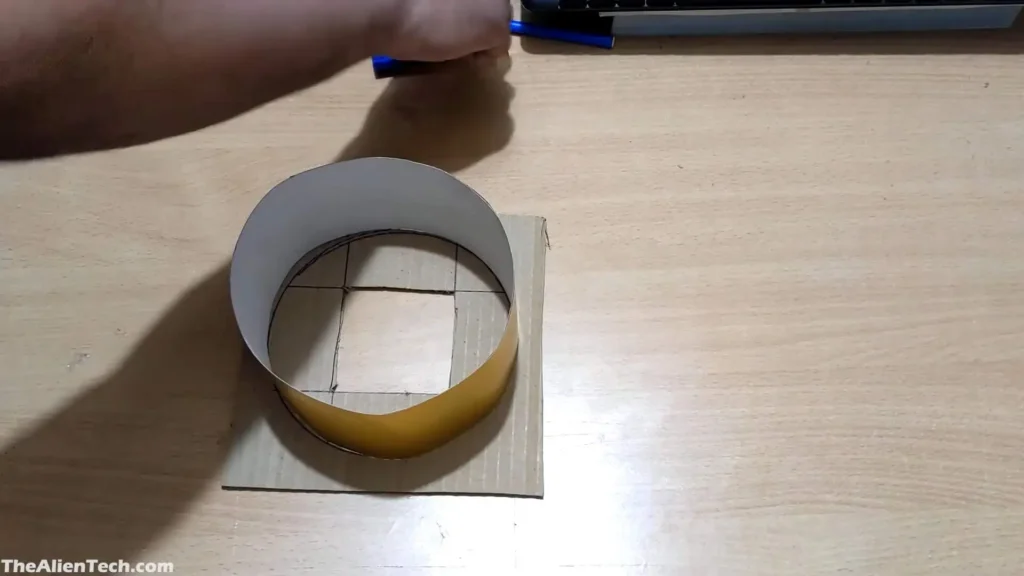
Next, cut a paper sheet. This sheet will hold your filter securely around your telescope. Measure the distance from the outside of the aperture to how far you want it to go. I chose around 10 cm. At 10 cm, my telescope has a red dot finder, so that seemed right to me. Cut the paper sheet accordingly. Wrap that part around the outer edge of your telescope tube, measure, and then glue it down. Make it slightly bigger than the telescope’s circumference so it’s easy to put on and take off.
Check if it fits well and if you can remove and attach it easily. Make any adjustments if needed.
Step 3
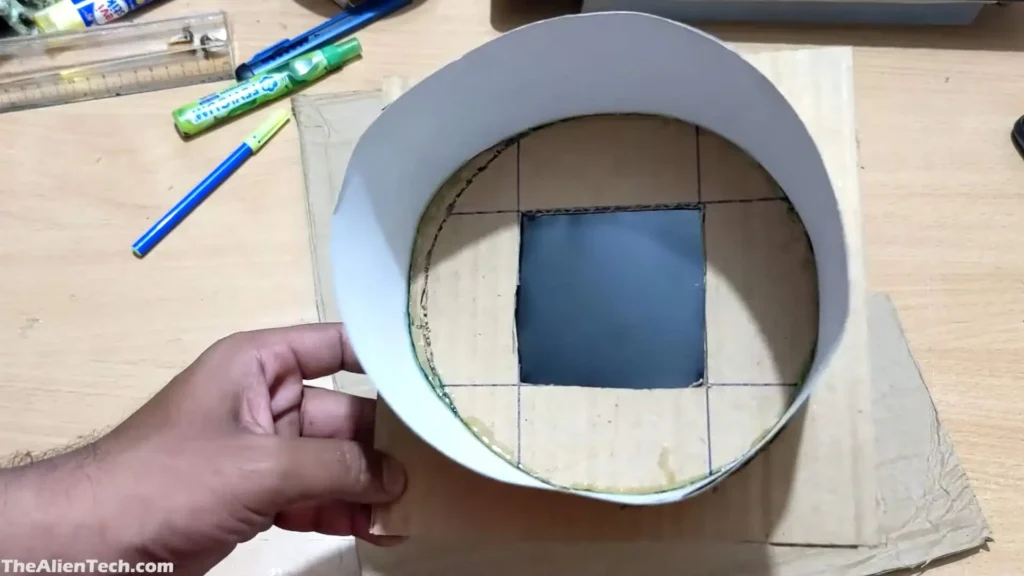
Now, we need to attach the circular sheet to the cardboard. Place it on the cardboard and draw a circle of the same size. This circular paper will hold the solar filter in place all the time, so it needs to be firmly fixed to the cardboard. Carefully make grooves on the circle for the paper sheet to fit into. Then, fit the circular paper into the groove and check for any adjustments needed.
Step 4
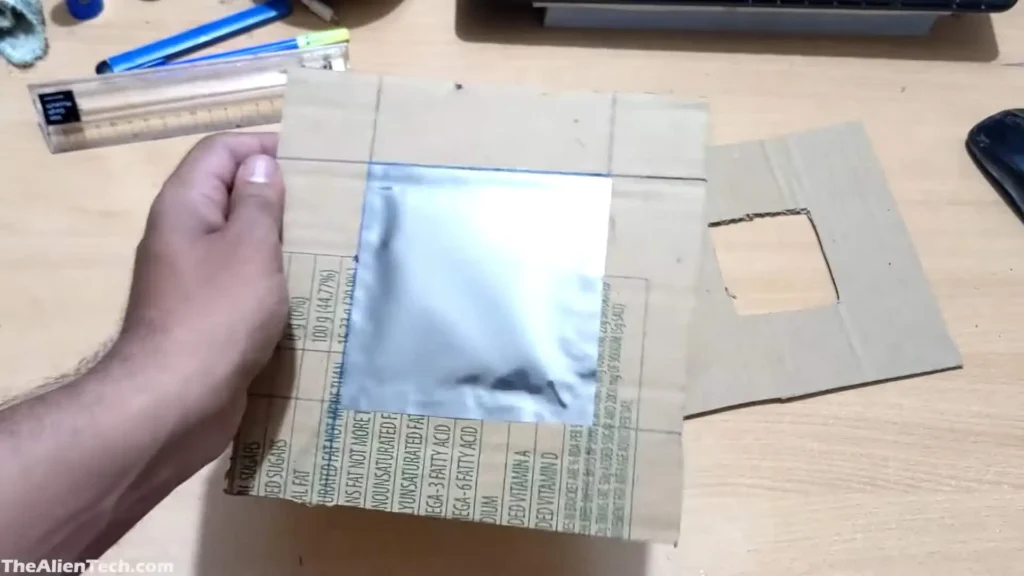
Measure the length of your square hole and cut the Baader film slightly bigger than that. Be careful not to damage the film while cutting. Make sure the darker or black side of the film faces the telescope and the silver side faces the sun. Glue the Baader film onto the cardboard sheet.
Step 5
Stack the second cardboard onto the first one, and your solar filter is almost ready.
Step 6
The last step is to fix the circular paper sheet with the filter. Put glue in the circular groove and attach the paper sheet with the filter. Let it dry for a couple of hours, and your filter is ready to use.
Buy Solar Filter
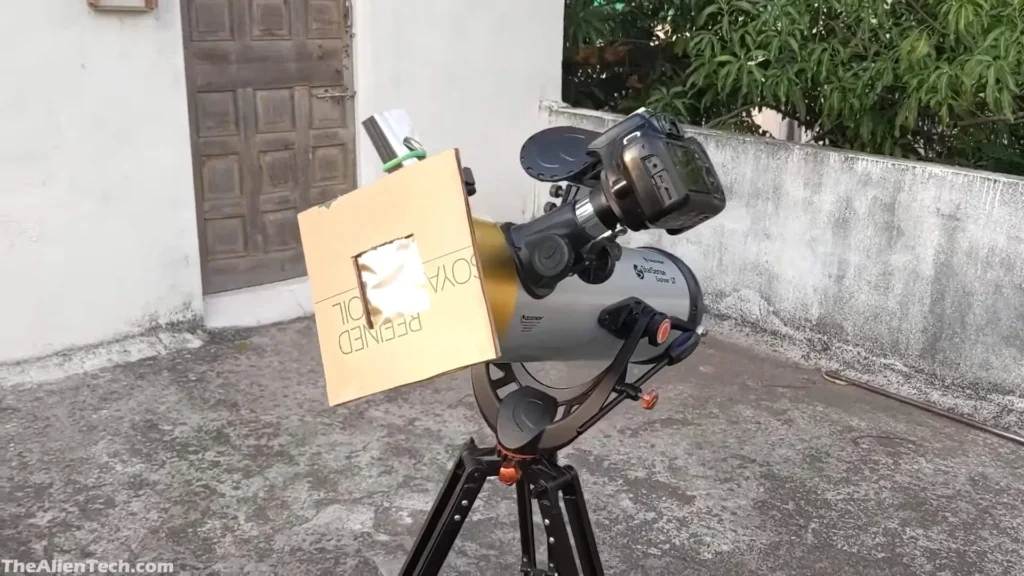
Solar Filter for NexStar 8SE
I used the same method and made a similar solar filter for my 8-inch NexStar 8SE telescope.
Checking the filter for safety
Before connecting it to the telescope, first check whether your solar filter has any leaks. So just hold the solar filter in front of your eyes and look at the sun, and you will see if there are any leaks there or not.
Using the filter
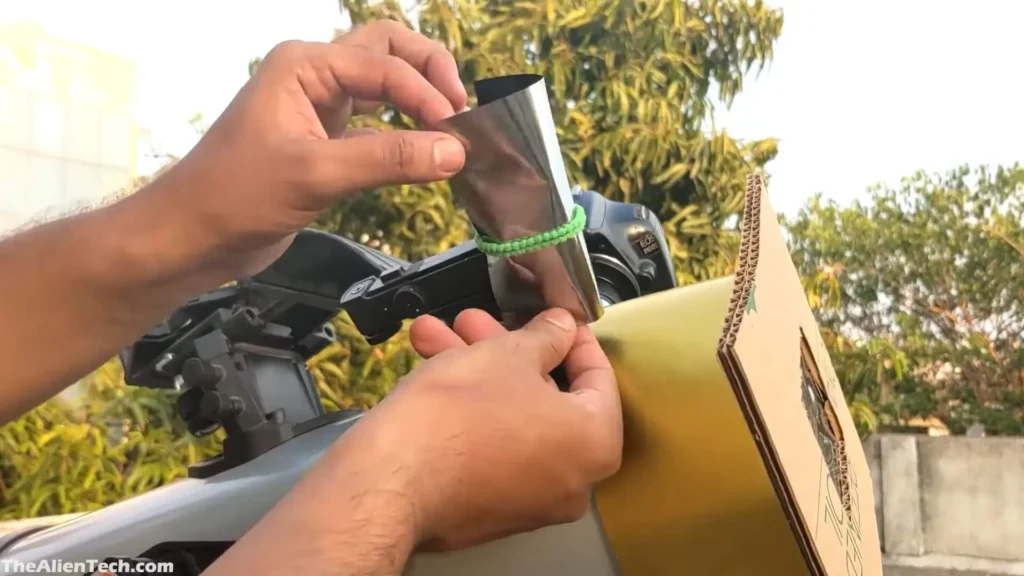
Fix the filter on the aperture. Now you have to point your telescope at the sun so that it is visible through the eyepiece. Usually during the night session, we point the red dot finder at the object, and then they are visible in the eyepiece. But during the day, looking at the sun through a red dot finder is just impossible; even if you manage to do that, you won’t see the red dot because of the brightness. So with the help of this hair band, I wrapped a small piece of Baader film around the red dot finder. Now you can clearly see the sun and point the red dot at the sun. You can normally use the telescope as you use it during the night session.
Now, before looking at the sun through the eyepiece, you should make sure that it is in the field of view with the help of your phone camera or a DSLR. Once you are sure that everything is safe, only look through the eyepiece. The best thing you can do is not look at the sun through the eyepiece; just use your phone and DSLR cameras to look at the sun.
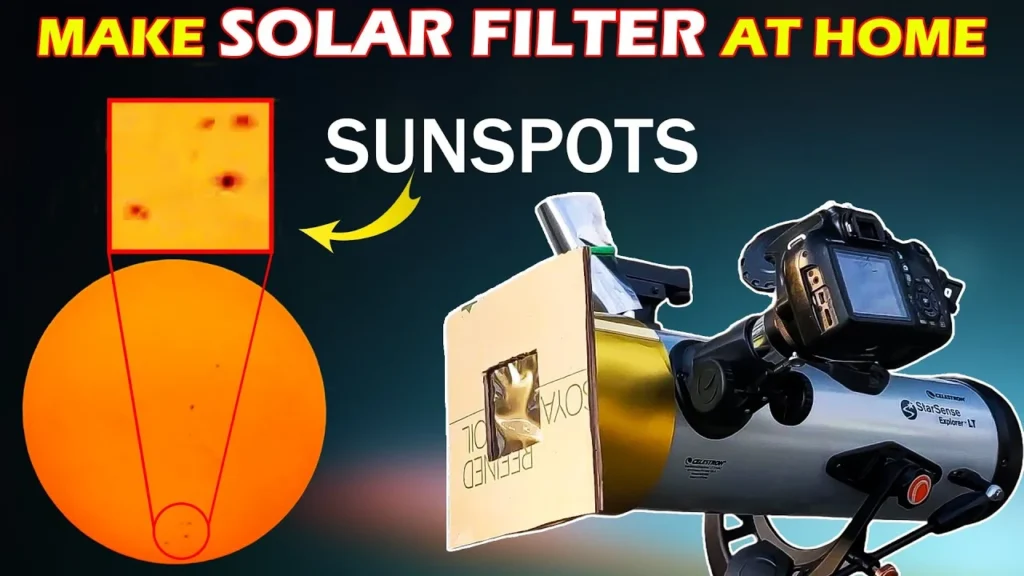
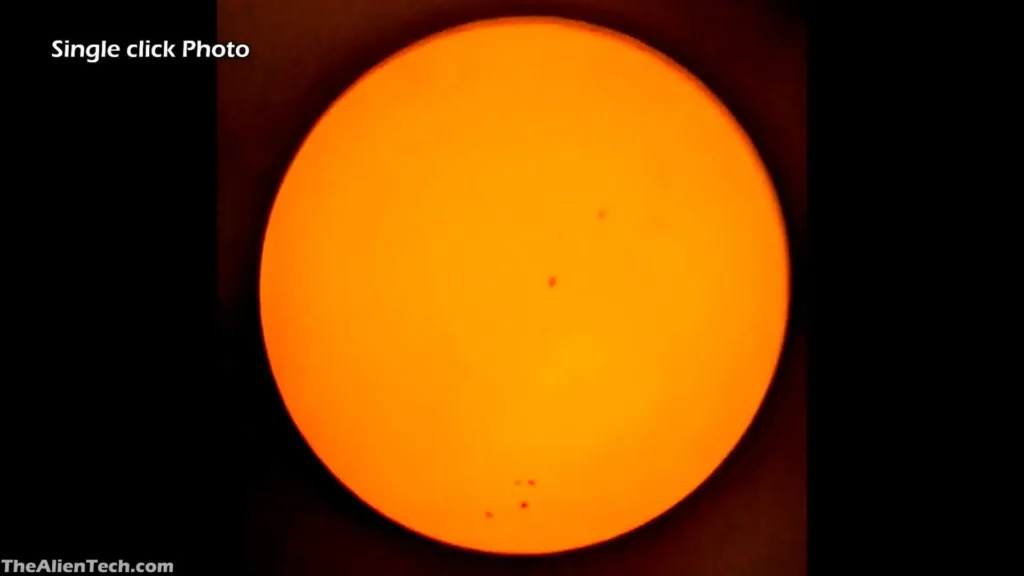
This is how the sun looks through this solar filter. It is a simple solar filter that will show you the disk of the sun and you can see those sunspots.
The visible portion of the sun is photosphere and it has a temperature about 5500 degrees. However these sunspots are cooler than the surrounding temperature; their temperature varies from 3000 to 4000 degrees. That’s why these sunspots appear darker. How many sunspots you can see depends upon the solar cycle. The solar cycle is11 years long. When there is a solar minimum in the solar cycle you will see very few sunspots and when there is a solar maximum in the solar cycle you will see more sunspots. The current solar cycle started in 2019 and it will end in 2030. As you can see right now we are just heading to the peak of the solar cycle and this pick will last till mid of the year 2026. So in the next two years you will see most of these sunspots on the sun
Views of the SUN through the Filter
These sunspots are as big as earth and some of these sunspots are also found with water vapours. This is a simple solar filter, with more advanced filters like H-alpha filter you can see more details of the sun.
Storing the filter
After the use, keep the filter in a safe place, and before using it again during the next session, always check whether the filter is in good condition and all the glued parts are still intact. Also, check if there are any leaks in the filter before every session. This way, you can be sure that there are no accidents.
That’s it. This is how you make a solar filter for your telescope at home. Again, be extremely careful while looking at the sun. A small mistake can cause you to permanently damage your eyes. If you want to learn more about astronomy and telescopes then check out our Website and YouTube channel.