Stephen Hawking is one of the most famous cosmologists most of us know. Even after being disabled with the disease. Professor Hawking has done various things such as writing a book and appearing in many popular tv shows which most would want to be a part of. Though he had written a book on theoretical cosmology, he had never used a telescope till 2015.
In 2015 professor Hawking’s team approached the top Telescope manufacturing company we all know as Celestron. They asked if Celestron could make a custom-made telescope that would work with professor Hawking’s Intel computer. Celestron obliged and made a custom stargazing setup for Professor Hawking.
Selecting The Hawking Telescope
Celestron Engineers had a clear goal of making a telescope that professor Hawing can use from the comfort of his home. Celestron makes a wide variety of telescopes but the important task was to choose the right telescope for Professor Hawking. They needed a telescope that is portable and had the ability to observe various objects from the moon to some deep space objects. Celestron engineers zeroed down on the “CPC Deluxe 1100 HD model”. CPC Deluxe series telescopes work for any type of astronomer.
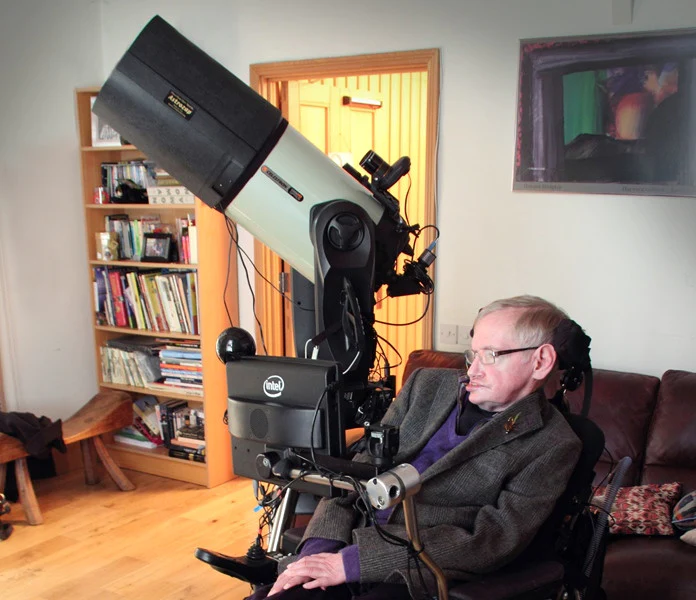
Professor Hawking was a busy person. So he needed a telescope system that would be ready to use without much hassle. His telescope had a tripod wheely bar to carry the telescope outside his house by his assistant. One of the reasons the CPC Deluxe telescope was a choice is that this telescope has a computerized alt-azimuth fork mount. Because of this computerized mount, there was no need to polar align the mount. This mount helped in taking the long exposure shots of the night sky. Overall the need for equatorial tracking was completely avoided to simplify the use of the telescope for professor hawking.
Handy Accessories
The biggest secret in Hawking’s telescope kit is Celestron’s StarSense AutoAlign. This handy accessory replaces your telescope’s finderscope and allows the telescope to orient itself to the night sky in about 3 minutes without any user input. Whenever professor hawking’s assistant took the telescope out and after pressing the align button on the StarSense auto-align. The telescope would align itself. This Auto-align feature worked great with the inbuilt GPS of the telescope. With this feature, you don’t have to worry about the observing location or which part of the sky is visible. The telescope automatically auto-aligns itself in the visible part of the sky. This feature is a huge time saver when you are in the field. It allows for a far more accurate alignment for better Astro images.
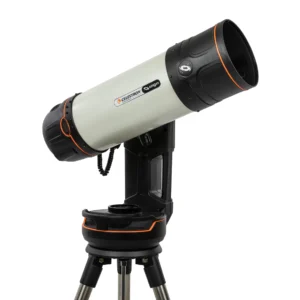
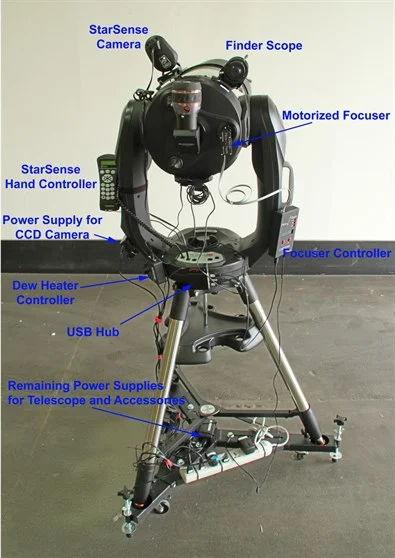
Full Hawking Telescope Setup
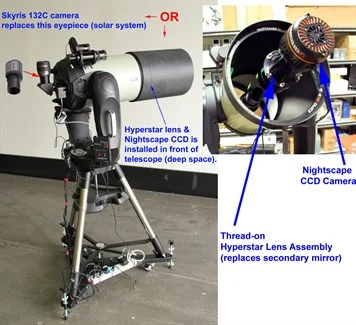
Here in this image, you can see the complete setup with all the accessories attached to this telescope.
Observations
When you want to observe nearby objects & planets in our solar system, then you need a longer focal length. So that you can zoom in, to view the maximum details of that object. A longer focal length telescope usually has a slow focal ratio. We have explained this in detail in this article. CPC Deluxe 1100 HD has a focal length of 2800mm and a focal ratio of 10. This is ideal to view the moon and planets in great detail.
On the other hand when you want to observe deep space objects, then you need a wide field of view, a short focal length & fast focal ratio. With help of Celestron’s fastar technology, you can achieve that with this Telescope. When you remove the secondary mirror of this telescope & replace it with a camera. Then the focal length will reduce down to 560mm and the focal ratio will be 2.
When they chose this telescope, they knew professor Hawking is not a normal observer. As he wasn’t able to move he had to use the telescope in a completely different way. Everything from the telescope’s field of view had to be live streamed on his computer screen.
While switching from viewing planets to deep space objects a normal observer would just switch the eyepieces. Many astrophotographers use two different setups to capture planets and deep space. As mentioned earlier, viewing planets and deep space objects need different settings for your telescope. So capturing the images from both types of observations was not possible with just one camera. Professor Hawking’s telescope using two different setups was not possible. So they used two different cameras. One camera was for planetary viewing and another was for deep space observations.
Camera Used
The planetary viewing camera was the Skyris 132C, it replaced the eyepiece. The second camera was Nightscape CCD. This camera is good for long exposures and was able to show you the live footage of the deep space.
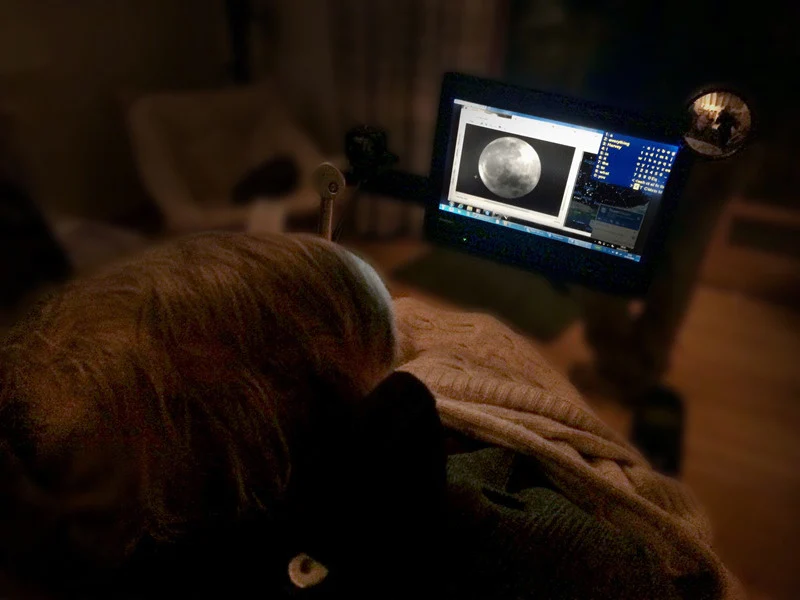
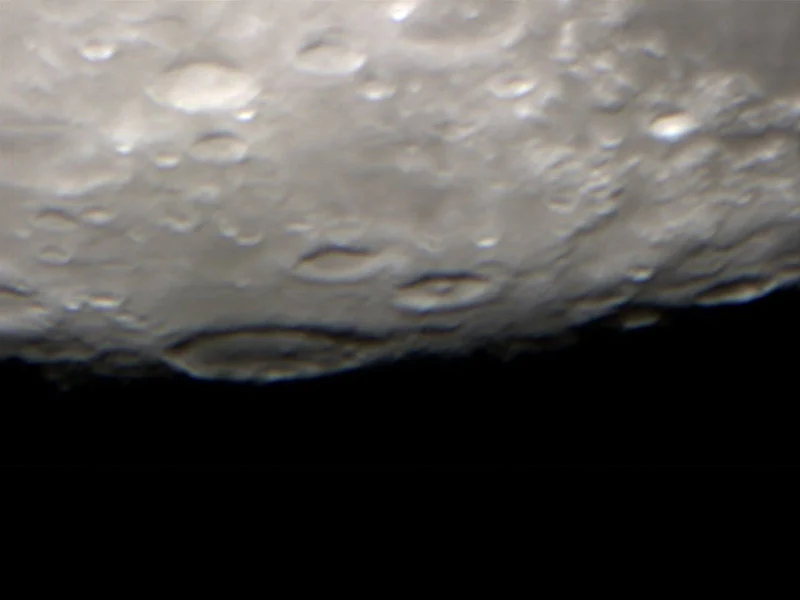
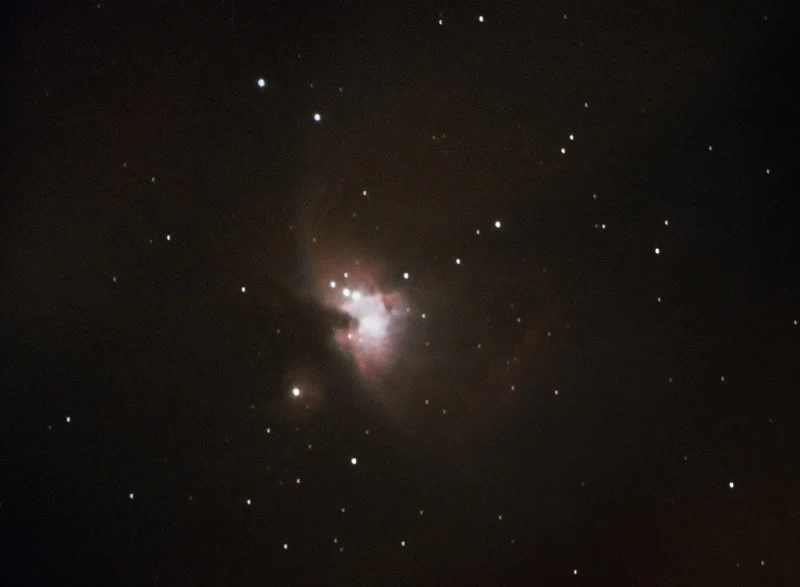
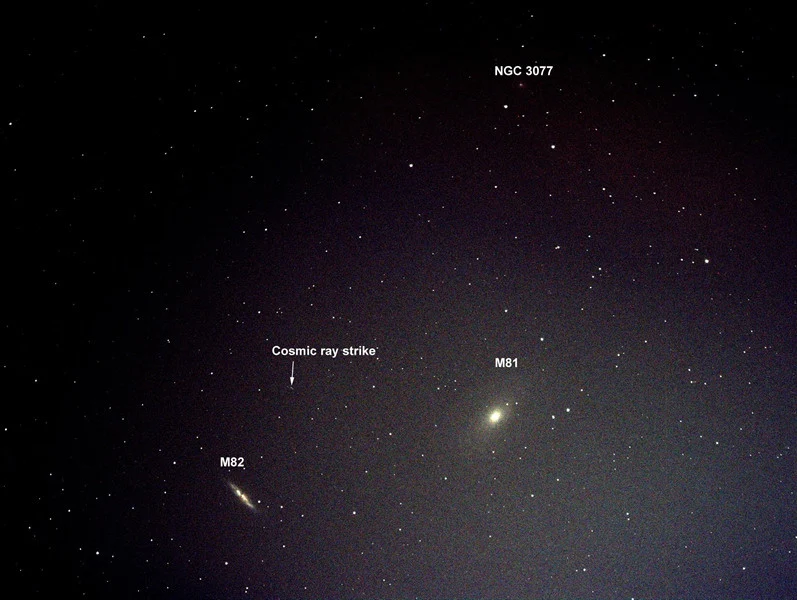
During his first few nights observing, Hawking captured craters on the Moon, the Orion Nebula, and a pair of galaxies in the constellation Ursa Major. Here are some of the images taken by professor Hawking with his telescope.
All this was connected to a separate computer. Professor hawking used to connect to that computer through Teamviewer to use the telescope. Overall the whole setup of Professor Hawking cost around $10,000. With the help of physical accessories, they also used some third-party software to make the use of the telescope as simple as possible for Professor Hawking.
So the point of making this article is. To let you know that even if you are disabled, you can still enjoy stargazing with an improved or slightly different setup. If you want to recreate this telescope for yourself. Then links to all the accessories which simplified using the telescope for professor Hawkings are below. You can also use these accessories if you want to enhance your stargazing experience. For example, if you use an auto-align accessory, it will save you a huge time to set up and align a telescope.